How to: Add Documents to the Document Library
Documents can be added to the Document Library database and share with other team members in Outlook.
1. From the Project Center highlight the Project that you want to add the document.
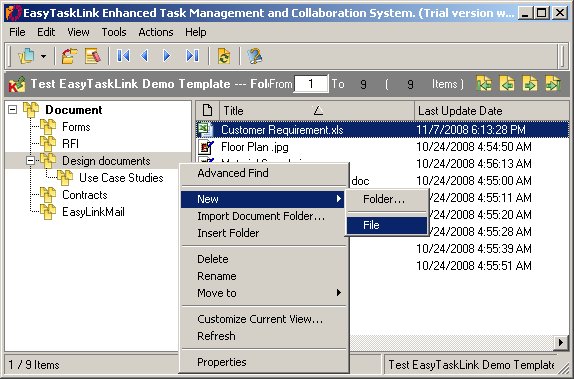
2. Click the Project...Documents buttons. The document screen is displayed.
3. Right mouse click on the folder then select New…File.

4. From the Insert File screen, select the file that you want to add the document in the document library and click Open. EasyTaskLink will make a compressed copy and save it in the file directory.
5. Select File…Exit to return to the Project Center.
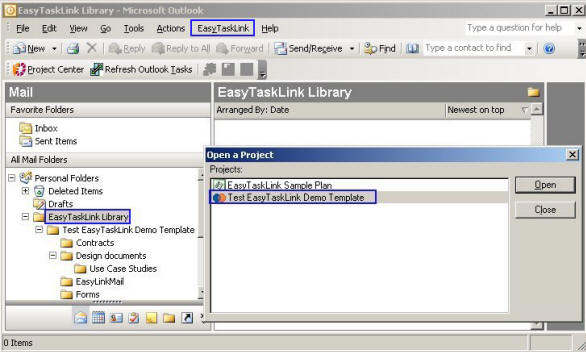
1. To add the documents in Outlook, from the Outlook EasyTaskLink drop down menu select Insert Document Library. The Open a Project screen is displayed.
2. Select the Project that you want to create the Document Library in Outlook Mail panel and click the Open button.

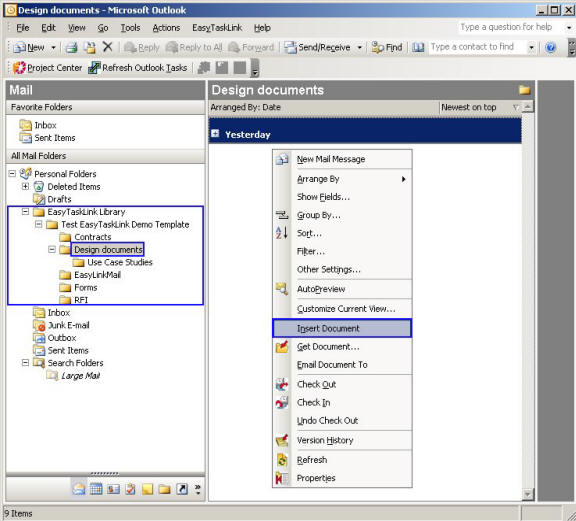
3. To insert a new document from the EasyTaskLink Library highlight the project folder then right mouse click on the right panel and click Insert Document from the drop down menu.

4. From the Insert File screen, select the file you want to add in the document library and click Open. EasyTaskLink will make a compress copy and save it in the file directory.
5. To open the documents from Outlook. Right mouse click on the document then select Open. (Note: Double click on the document will not open the document.)
6. Click File…Exit to exit Outlook.