How to: Create a Status Report
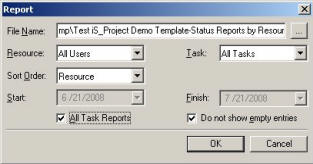
1. From the Project Center select Reports…Status Report. The Report setup screen is displayed.
2. From the File Name drop down menu choose the designated disk drive to save the Status Report or simply accept the default.

3. Select the individual user or All Users in the Resource menu.
4. Select All Tasks or an individual task in the Task menu.
5. The Status Report can be sorted by Resource or Task.
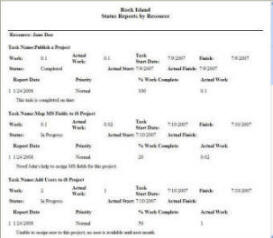
6. Check the All Task Reports box if you want all the tasks to be included in the Status Report. If you do not want to show the empty entries, this box must be checked. Then click OK the Status Report will be saves and popup on screen.

· Enter the Start and Finish Date. If you want the report within a specific period then click OK and the Status Report will popup.
· If you do not see your Status Report on your screen. Please check your Internet Explorer and make sure Popup okay is set.