How to: Setup SMTP to Receive Notifications
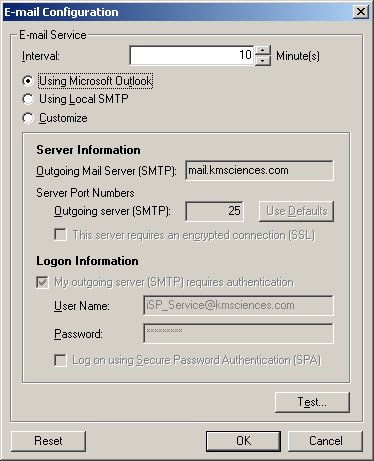
This document describes the process to customizing your SMTP Setting in EasyTaskLink. EasyTaskLink sends email notifications via SMTP or Customize settings. The default is using a POP3 account from KM Sciences. We use iSP_Service@kmsciences.com as User Name and iSP_Service90 as password. We recommend that you change this to your own POP3 account from your email provider or using Windows SMTP services. The process and setting is identical to your Outlook email account. The server may be any Outgoing Mail Server you are signed up with. If you are using EasyTaskLink from the confines of a LAN system and your system administrator allows you to configure your outgoing SMTP service you may use this setting. Press the “Test” button and enter the email address in the Check Email Configuration screen to test and be sure the settings are working.
Note: This option is the most efficient way to send notifications.
For Windows XP Users.
1. From the Start menu select Programs…EasyTaskLink…Utility…FileService. The EasyTaskLink File Service screen is displayed.
2. Select Configuration…E-mail Configuration. The following screen is displayed. If you are using Windows XP simply check the Use Local SMTP box and there is not further setting required.

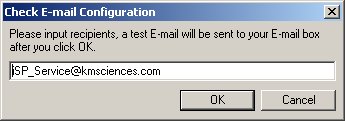
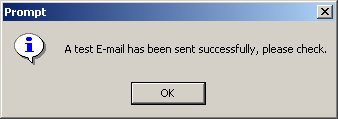
3. Press the Test button and enter the email address to be sure the settings are working. You will receive a screen to enter your e-mail address; this can be any e-mail address where you can easily verify that the email was sent. You should receive a message A test e-mail has been sent successfully, please check. This indicates that EasyTaskLink was able to send out tasks successfully from the SMTP server.
For Windows 2000 Users.
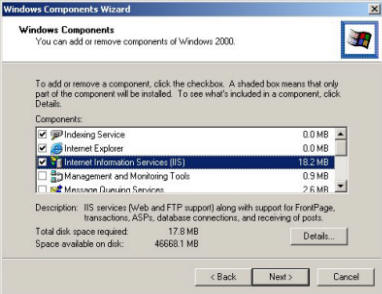
1. Check if the system is configured to use SMTP services. From Start...Settings...Control Panel...Add/Remove Program. Click Add/Remove Windows Components icon. Click Internet Information Services (IIS). You should see that the SMTP Service should be checked. If it is not, check it ON. Make sure you have your Windows 2000 CD available.
2. Repeat the step "For Windows XP Users" above.
Note: Use this option if your system does not support Windows SMTP.
1. From the Start menu select Programs…EasyTaskLink…Utility…FileService. The EasyTaskLink File Service screen is displayed.
2. Select Configuration…E-mail Configuration. The following screen is displayed.
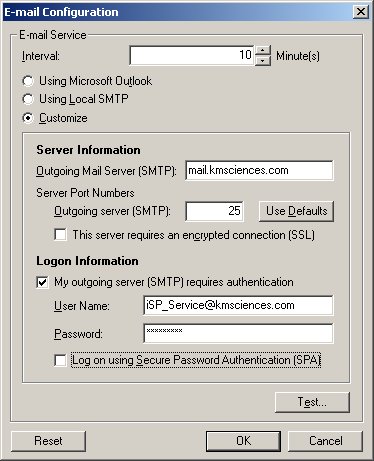
3. Click the Customize radio button from the Notification E-mail Configuration screen.
4. Enter your Outgoing Mail Server SMTP in the Server Information. (Obtain this information from your email provider).
5. Some email provided require you to use different port number for SMTP service. (Obtain this information from your email provider)
6. Enter the User Name and Password which you use to log on to the service. (Obtain this information from your email provider).
7. Press the Test button and enter the email address to be sure the settings are working. You will receive a screen to enter your e-mail address; this can be any email address where you can easily verify that the email was sent. You should receive a message A test e-mail has been sent successfully, please check. This indicates that EasyTaskLink was able to send out tasks successfully from the SMTP server.